Remote Office Workers And Easy Communication
Under some circumstances workers that work from home or in different offices may want to stay continuously connected, with the same ease of access as you would have if you were working in a group around a table. Most VOIP systems used for telephony services can work, but setting up conferences can be annoying, and the always-on behavior and difficultly to “break out” from a group chat to chat privately can be annoying.
What Is TeamSpeak?
Why TeamSpeak and not Ventrilo/Skype/Mumble?
Ventrilo
Ventrilo is a VoIP solution commonly used for video games. The business model for ventrilo revolves around licensing for resellers, with only the 8 seat server being available for download. Additionally it’s old and doesn’t have the nicer security features of Mumble and TeamSpeak 3.
Skype
Skype It doesn’t provide the instant access and ability to “jump in” to rooms at any times, also the total control of the environment helps improve security.
Mumble
Mumble is an open source VoIP solution that has picked up a lot in the gaming community. Unlike Ventrilo it isn’t limited to the 8 seats or TeamSpeak which is limited to 512 for free servers. Mumble would be my second choice, however last time I used Mumble it wasn’t quite as polished in terms of ease to use and set up, otherwise it would be my first.
Additional Security Settings You’ll Enjoy
Security Tokens Vs. Passwords
Everyone’s identity has a private key that they use to identify themselves with. This private key removes the need for user account management with passwords on every server they connect to. This also allows the user to export their private key to their other devices and have their identities follow them around regardless of the device.
Setting Up Virtual Servers
Virtual servers allow you to have multiple TeamSpeak instances on a single TeamSpeak install. You’re still limited by your total license count (so if you have a 512 connection license, you can have 2×256 connection virtual servers, or however you want to divvy that up).
Setup and Install
We’re going to download TeamSpeak 3 and install it into /opt/teamspeak, get the latest download from the TeamSpeak 3 site.
root@teamspeak:/# cd /opt
root@teamspeak:/opt# wget http://dl.4players.de/ts/releases/3.0.10.1/teamspeak3-server_linux-amd64-3.0.10.1.tar.gz
root@teamspeak:/opt# tar xvf Teteamspeak3-server_linux-amd64-3.0.10.1.tar.gz
root@teamspeak:/opt# mv teamspeak3-server_linux-amd64 teamspeak
Now we’ll fire up TeamSpeak.
root@teamspeak:/opt/teamspeak# ./ts3server_startscript.sh start
Starting the TeamSpeak 3 server
TeamSpeak 3 server started, for details please view the log file
root@teamspeak:/opt/teamspeak#
------------------------------------------------------------------
                      I M P O R T A N T
------------------------------------------------------------------
               Server Query Admin Account created
         loginname= "serveradmin", password= "G1Cucbel"
------------------------------------------------------------------

------------------------------------------------------------------
                      I M P O R T A N T
------------------------------------------------------------------
      ServerAdmin privilege key created, please use it to gain
      serveradmin rights for your virtualserver. please
      also check the doc/privilegekey_guide.txt for details.

       token=dnYcuap7EllX2NcYo2R7QTJvkSWoF3ju178FDGx8
------------------------------------------------------------------
The serveradmin username/password and token you’re given are very important, save them, we’ll be using them later.
Logging Into TeamSpeak
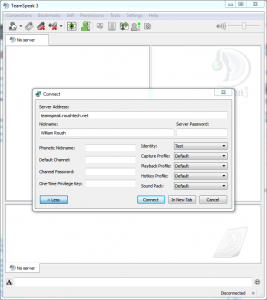
Fire up your TeamSpeak client, click “Connections” and select “Connect”, you’ll be presented with the connection window.
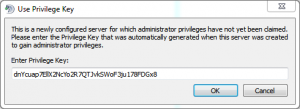
You’l want to take that token you had in the installation step and put it into the privilege window that pops up. If it doesn’t pop up select “Permissions” and “Use Privilege Key”. Entering this key will make you a server administrator for this virtual server instance.
Virtual Server Configuration
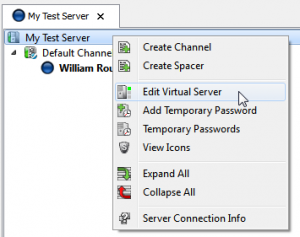
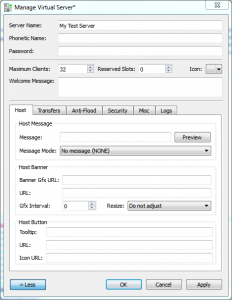
Next we’ll dive into the configuration of the virtual server, right click on the name of the server and select “Edit Virtual Server”.
Here you’re given options to change the server name, put limits, passwords, change security settings, and configure various messages the user will get upon logging on to your server.
Configuring Chat Rooms
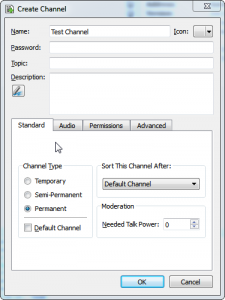
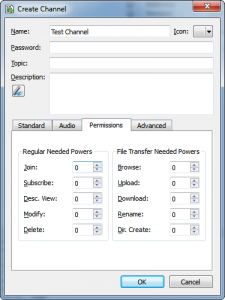
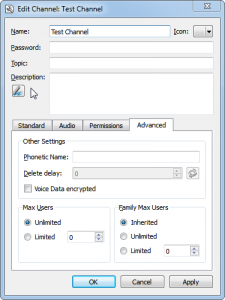
Right click on the server again and select “Create Channel”
Here we can give a channel a name, topic, description and set it’s type (usually you’ll be setting this to “permanent”). The audio tab allows you to edit audio codec settings, you can configure the trade-off between sound quality and bandwidth requirements here. Changing codec settings can be useful for making a channel for which people on flaky cell phone connections can join in.
